Welcome to blog.neverendingqs.com!
I have been looking for some time to share some of my knowledge and experience as a software developer to the rest of the world, and I’m glad to be able to finally getting started!
Since I spent considerable time setting up this blog, I thought it would be fitting to walk through what I did to get set up.
Background
This blog is hosted on Heroku using Ghost on Heroku.
Ghost is a blogging engine with a clean user interface that is centered around Markdown. That’s perfect for me as it allows me to use a markup language I already know and love.
Heroku is a cloud Platform-as-a-Service (PaaS) that offers web application hosting (free, up to a certain limit).
Ghost on Heroku
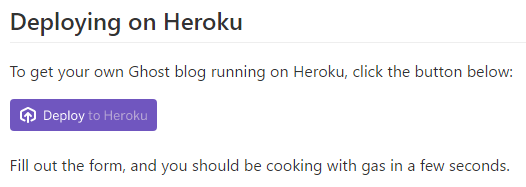
I discovered it was really easy to get started with Ghost on Heroku. To deploy Ghost, I clicked the Deploy to Heroku button.
For image hosting, I didn’t want to use AWS S3, so I left those environment variables blank. Instead, I use Netlify and host my images under a custom subdomain of neverendingqs.com.
Speaking of subdomains, I had a custom domain ready (blog.neverendingqs.com). After Heroku finished deploying Ghost, I went to Settings => Domains and certificates, and added the domain entry there.
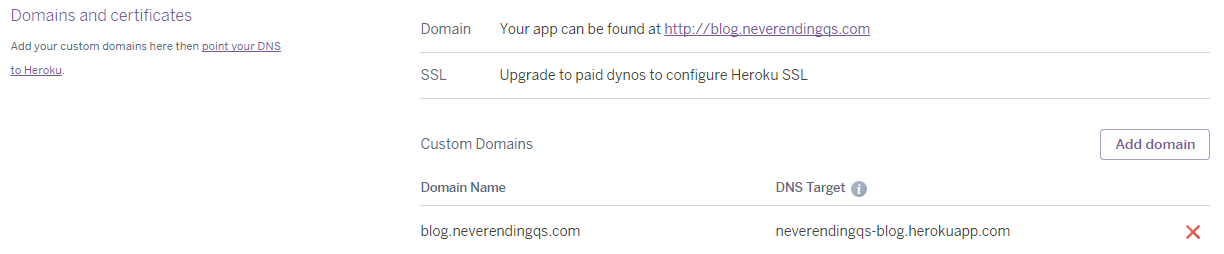
In my DNS console, I added a CNAME reference from blog to https://neverendingqs-blog.herokuapp.com.

Blog Theme
I decided to go with a modified version of the Material-Sidenav-Ghost-Theme, which included adding Disqus to all my blog posts.
To install it, I used git submodule to clone the theme into content/themes/. However, I wasn’t able to get Heroku to clone the submodule successfully on deployment, so I converted the theme into a npm package, and added that to packages.json on a fork of Ghost on Heroku. Finally, I hooked up the forked repo to the Heroku app for a continuous deployment experience.
Code Diff
This is for those who want a deeper dive into the changes I made:
Final Note: Heroku Free Dynos
I went with Heroku’s free tier, as it allowed me to start a blog without committing to it (money-wise). Here are some suggestions for those planning to use free dynos as well.
Custom Domains
If you are going with Heroku’s free dyno option and are using a custom domain name, note that the custom domain will not be over HTTPS. Make sure to use the default Heroku URL with HTTPS to log into Ghost when performing administrative tasks. Otherwise, anyone watching your login traffic can see what your username and password is when you log in.
For me, that means using https://neverendingqs-blog.herokuapp.com/ghost to log in instead of http://blog.neverendingqs.com/ghost.
Dyno Sleep
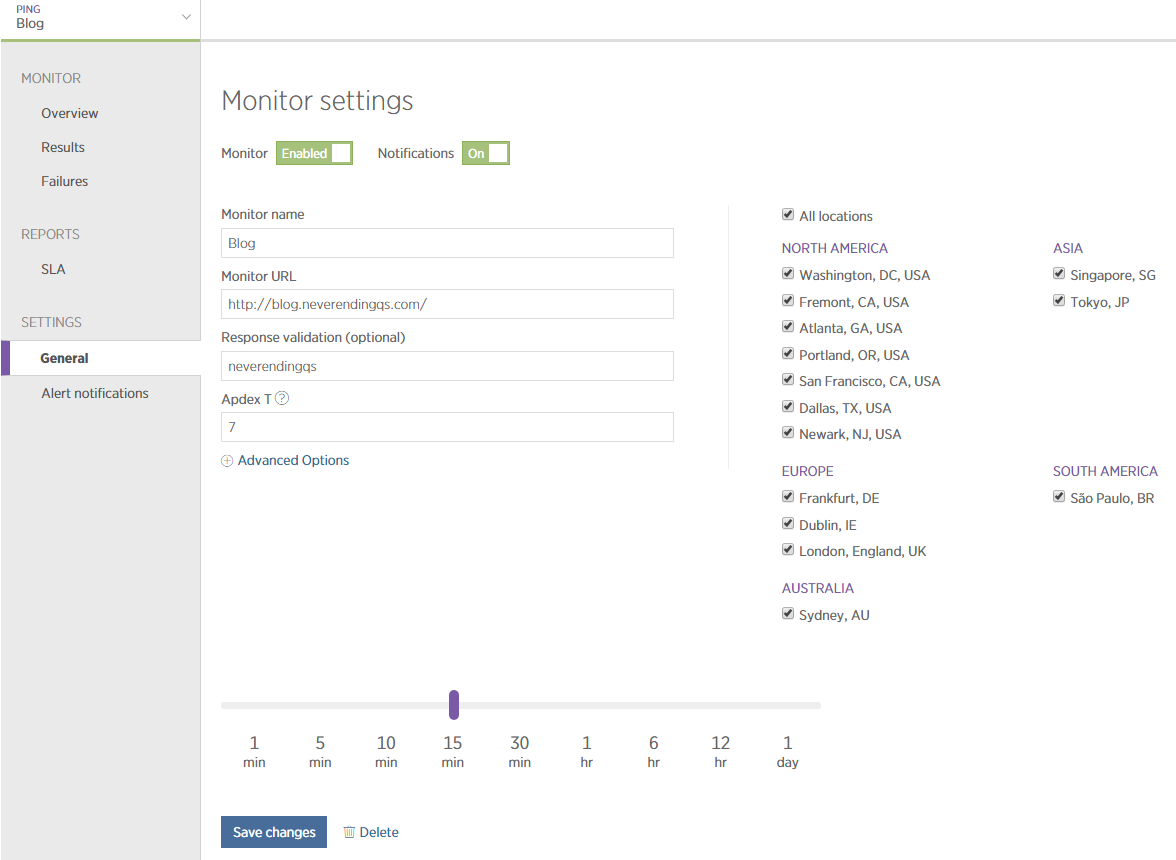
To keep your free dyno from sleeping, consider using the New Relic APM add-on. The Wayne plan is free and you can use it to set up Synthetics, which will ping your website at a set interval to ensure it is still up. It acts as both away to keep your dyno from sleeping and ensure it’s responding at the cost of some free dyno hours.
Conclusion
Thanks for taking the time to check out my first blog post. Let me know your thoughts and questions in the comments below!